How to print dtf step by step
The DTF process is as straightforward as its name implies: print on a film and transfer directly to fabric. The ability to choose practically any fabric is the most important aspect that makes this procedure appealing to a wider audience. The DTF printing technology will work its magic on polyester, cotton, silk, or synthetic fabrics like rayon or terrycot.
Pre-requisites for DTF Printing
- DTF printer
- DTF inks
- DTF powder
- DTF film
- RIP Software: Maintop, Photoprint
- Heat press
Steps of Direct to Film Printing
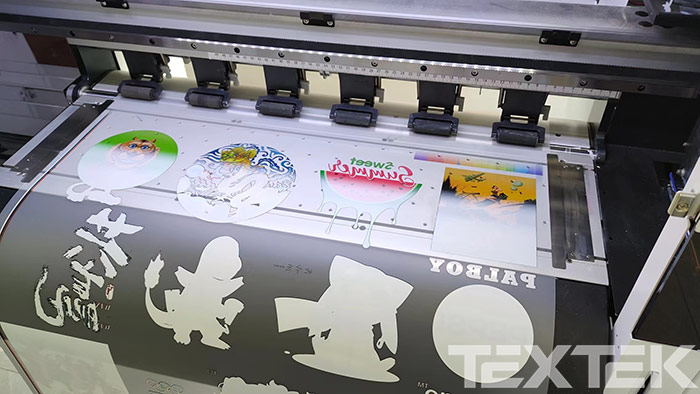
Step 1 – Print on Film
Place PET film in the printer trays instead of ordinary paper. First, print the full image on PET film in white. After that, print the desired picture on the white image layer using the printer’s proper color settings. The most important thing to remember is that the film print must be a mirror image of the picture that will be printed on the fabric.
Step 2 – Powdering
The application of hot-melt powder to the film with the printed image is the next step. When the ink is wet, the powder is evenly distributed, and any surplus powder must be carefully removed. The most crucial thing is to make sure the powder is evenly distributed across the film’s printed surface.
One usual method is to hold the film at its short edges so that its long edges are parallel to the floor (landscape orientation) and pour the powder in the middle of the film from top to bottom, forming a 1-inch thick heap in the center.
Step 3 – Melting the powder
The powder is melted in this process, as the name implies. This can be accomplished in a variety of ways. The most typical method is to place the film in the Curing Oven with the printed image and applied powder and heat it. If you don’t have access to a curing oven, place the film inside a heat press and bring the top of the press extremely close to but not touching the film.
Between the film and the heat press top plate, there should be a 4 to 7 mm space. The press top can be fastened with a metal wire so that it does not close over the film and leaves a necessary gap. It is highly advised that you follow the manufacturer’s powder melting specifications for the best results. The heating time varies depending on the powder and equipment, but it usually takes 2 to 5 minutes at a temperature of 160 to 170 degrees Celsius.
Step 4 – Pre-pressing
The step entails pre-pressing the fabric prior to the picture being transferred by the film. The fabric is maintained in the heat press for around 2 to 5 seconds before being pressured under heat. This is done to flatten the fabric while also ensuring that it is dehumidified. The pre-pressing aids in the proper image transfer from the film to the cloth.
Step 5 – Transfer
This is where the DTF printing process starts. For a firm bond between the film and the fabric, the PET film with the image and melted powder is placed on the pre-pressed cloth in the heat press. Curing is another term for this technique. Curing takes about 15 to 20 seconds at temperatures ranging from 160 to 170 degrees Celsius. The film is firmly adhered to the cloth at this point.
Step 6 – Cold Peel
Before removing the film, the fabric and the now-attached film must cool to room temperature. Because the hot melt has a characteristic similar to amides, it works as a binder when it cools, keeping the colored pigment in the inks firmly adhered to the fabric fibers. The film must be removed off the fabric once it has cooled, leaving the appropriate design printed in ink on the fabric.
Step 7 – Post-pressing
This phase is optional, although it is strongly suggested for optimal results and high-performance metrics such as wash and rub fastness. The final cloth with the transferred design is pressed for 10 to 15 seconds in the heat press in this phase.
DTF printing pros and cons
Pros
- Works with almost all types of fabrics
- Does not require pre-treatment like DTG
- No colours limit, can print any colour.
- The fabric has a very slight hand feel touch and vibrant colour.
- The Fabrics thus designed exhibit good wash characteristics.
- The process is faster and less tedious than DTG printing.
Cons
- The feel of the printed areas is slightly affected when compared to that of fabrics designed with DTG printing.
- More expensive if the printing area is large